
Introduction to Peanut Butter Banana Bliss Bites
In today’s fast-paced world, finding a snack that is both nutritious and delicious can often feel like a daunting task. Enter Peanut Butter Banana Bliss Bites—a delightful solution that combines the natural sweetness of ripe bananas with the rich, creamy goodness of peanut butter. These bite-sized treats are not just satisfying to the taste buds; they also pack a nutritional punch, making them an excellent choice for a quick energy boost any time of the day, whether you’re gearing up for a workout, need an afternoon pick-me-up, or simply want a delicious dessert.
Peanut Butter Banana Bliss Bites are incredibly easy to prepare, requiring minimal ingredients and effort. They are perfect for busy individuals and families alike, providing a wholesome option that can be enjoyed on the go. In this article, we will delve into the delightful world of these blissful bites, offering a comprehensive guide on how to prepare them, highlighting their nutritional benefits, and exploring creative variations to cater to your personal taste.
Understanding the Ingredients
The Star Ingredients: Bananas and Peanut Butter
At the heart of Peanut Butter Banana Bliss Bites are two primary ingredients: bananas and peanut butter. Each of these components offers unique health benefits that make this snack not just tasty but also a valuable addition to your diet.
Nutritional Benefits of Bananas:
Bananas are often hailed as a superfood due to their rich nutritional profile. They are an excellent source of potassium, which is essential for heart health and muscle function. Additionally, bananas are high in dietary fiber, which aids in digestion and helps maintain a feeling of fullness. The natural sugars in bananas provide a quick source of energy, making them ideal for active lifestyles. Furthermore, bananas contain vitamin C and vitamin B6, both of which play vital roles in immune function and metabolism.
The Role of Peanut Butter in Providing Protein and Healthy Fats:
Peanut butter complements bananas perfectly, adding a creamy texture and a rich flavor. More importantly, it is a fantastic source of protein and healthy fats. The protein content in peanut butter helps with muscle repair and growth, while the healthy fats contribute to satiety, making you feel fuller for longer. Additionally, peanut butter contains essential vitamins and minerals, including vitamin E, magnesium, and niacin, which support overall health.
The Supporting Cast: Oats, Honey, and Vanilla
While bananas and peanut butter are the stars of this recipe, several supporting ingredients elevate these bliss bites to another level.
Importance of Rolled Oats for Fiber and Texture:
Rolled oats are a key ingredient that adds both texture and nutritional benefits to the bites. Rich in soluble fiber, oats help regulate blood sugar levels and promote digestive health. They also provide a chewy texture that balances the creaminess of the peanut butter and bananas, creating a satisfying mouthfeel.
Differences Between Honey and Maple Syrup for Sweetening:
When it comes to sweetening these treats, honey and maple syrup are both excellent choices. Honey is a natural sweetener that adds a distinct flavor and has antimicrobial properties. It is also rich in antioxidants. On the other hand, maple syrup offers a unique taste profile that many find appealing, and it is also packed with minerals such as manganese and zinc. Choosing between these two sweeteners can depend on personal preference, dietary restrictions, and flavor preferences.
How Vanilla Extract Enhances Flavor Complexity:
A splash of pure vanilla extract can significantly enhance the flavor of Peanut Butter Banana Bliss Bites. Vanilla adds depth and richness, complementing the sweetness of the bananas and the nuttiness of the peanut butter. It can elevate the overall taste of the bites, making them even more irresistible.
Optional Additions: Chocolate Coating
For those who wish to take their Peanut Butter Banana Bliss Bites to the next level, a chocolate coating can add a delightful twist.
Benefits of Dark Chocolate:
Dark chocolate is not only a delicious indulgence but also offers several health benefits. It is rich in antioxidants, which can help combat oxidative stress in the body. Additionally, dark chocolate has been associated with improved heart health and can even enhance mood due to the release of endorphins.
The Role of Coconut Oil in Melting Chocolate:
To create a smooth chocolate coating, adding a bit of coconut oil to melted dark chocolate is a great technique. Coconut oil helps achieve a silky consistency that adheres well to the bites, ensuring an even coating. Plus, coconut oil adds a subtle flavor that complements the other ingredients beautifully.
Step-by-Step Preparation Guide
Preparing the Bananas
The first step in creating Peanut Butter Banana Bliss Bites is selecting the perfect bananas. Ripe bananas are essential for achieving the ideal sweetness and consistency. Look for bananas with a few brown spots on the peel, as this indicates they are at their peak ripeness.
Techniques for Mashing Bananas to the Right Consistency:
Once you have your ripe bananas, it’s time to mash them. Use a fork to mash the bananas in a bowl until they reach a smooth, even consistency. Aim for a texture that is slightly chunky rather than completely pureed, as this will contribute to the overall texture of the bliss bites. If you prefer a smoother mixture, you can use a food processor for a quick blend.
Combining the Ingredients
After preparing the bananas, it’s time to combine them with the other ingredients. In a large mixing bowl, add the mashed bananas, peanut butter, rolled oats, honey (or maple syrup), and vanilla extract.
Detailed Instructions for Mixing and Achieving the Right Texture:
Using a spatula or wooden spoon, mix the ingredients together until well combined. Take your time to ensure that the peanut butter is evenly distributed throughout the mixture. The goal is to achieve a thick, cohesive mixture that holds together without being too sticky. If the mixture feels too dry, you can add a little more honey or a splash of water to help bind it.
Tips for Ensuring a Cohesive Mixture:
To ensure a smooth and cohesive mixture, it can be helpful to mash the bananas thoroughly before adding the other ingredients. Additionally, incorporating the oats gradually can help you gauge the texture, allowing you to adjust the mixture as needed.
Forming the Bites
With your mixture ready, it’s time to portion and shape the bliss bites.
Best Practices for Portioning and Shaping the Bites:
Using a tablespoon or small cookie scoop, scoop out portions of the mixture and roll them into balls with your hands. Aim for a uniform size, about 1 to 1.5 inches in diameter, to ensure even freezing.
Importance of Uniform Size for Even Freezing:
Uniformly sized bites will freeze evenly, ensuring that each one achieves the same level of firmness and texture. This is particularly important if you plan to store them for later enjoyment.
Freezing the Bites
Once shaped, the bliss bites need to be frozen to achieve the desired texture.
Explanation of How Freezing Impacts Texture and Flavor:
Freezing the bites not only helps them firm up but also enhances their flavor as the ingredients meld together. The cold temperature creates a satisfying bite that is perfect for snacking.
Recommended Freezing Duration for Optimal Firmness:
For best results, freeze the Peanut Butter Banana Bliss Bites for at least 1 to 2 hours, or until they are firm to the touch. Once they are frozen, you can store them in an airtight container in the freezer for easy access whenever you need a nutritious snack.
Optional Chocolate Coating Process
For those who want to indulge a bit further, preparing a chocolate coating is the final step in elevating these bites.
Preparing the Chocolate:
To make the chocolate coating, start by melting dark chocolate with a bit of coconut oil in a microwave-safe bowl or a double boiler. Stir the mixture occasionally until it is smooth and fully melted. Once melted, dip each frozen bliss bite into the chocolate, allowing any excess to drip off before placing them back on the parchment-lined baking sheet.
With these initial steps, you are well on your way to creating your own Peanut Butter Banana Bliss Bites. Stay tuned for the next part of the article, where we will explore additional tips, tricks, and variations to make this recipe your own!
{{image_2}}
Instructions for Melting Chocolate Safely
To create a luscious coating for your Peanut Butter Banana Bliss Bites, melting chocolate is an essential step. Here’s how to do it safely:
1. Choose the Right Method: You can melt chocolate using either the microwave or a double boiler. The microwave is quicker, but the double boiler provides more control over the temperature.
2. Microwave Method:
– Break your chocolate into small, even pieces and place it in a microwave-safe bowl.
– Heat the chocolate in 30-second intervals at medium power. After each interval, remove the bowl and stir. This helps distribute heat evenly and prevents the chocolate from burning.
3. Double Boiler Method:
– Fill a saucepan with a few inches of water and place it on the stove over low heat.
– Place a heatproof bowl on top of the saucepan, ensuring it doesn’t touch the water.
– Add your chocolate to the bowl and stir continuously as it melts. This method allows for gentle heating, reducing the risk of burning.
Importance of Stirring to Avoid Burning
Regardless of the method used, stirring is crucial. Chocolate can easily scorch, especially in the microwave. Stirring helps to cool down any overheated spots and ensures that the chocolate melts uniformly. Once your chocolate is melted and smooth, it’s ready for dipping!
Coating the Bites
Techniques for Achieving an Even Chocolate Coating
To achieve a perfect chocolate coating on your Peanut Butter Banana Bliss Bites, follow these steps:
1. Prepare Your Work Surface: Line a baking sheet with parchment paper. This will prevent the bites from sticking once coated.
2. Dip with Care: Using a fork or a toothpick, carefully dip each frozen bite into the melted chocolate, ensuring that it is fully covered. Allow any excess chocolate to drip off back into the bowl.
3. Tap Off Excess: Gently tap the fork or toothpick against the edge of the bowl to remove any excess chocolate. This step is essential to avoid puddles of chocolate on the baking sheet.
4. Place on Parchment: Transfer the coated bite to the parchment-lined baking sheet. Repeat the process until all bites are coated.
Tips for Managing Excess Chocolate
Sometimes, you may find yourself with leftover melted chocolate. Here are some tips to manage it:
– Drizzling: Use a spoon to drizzle any extra chocolate over the coated bites for an elegant look.
– Storage: Pour the leftover chocolate onto a piece of parchment paper or a silicone mat to cool and harden, then break it into pieces for snacking later.
– Reuse: If you plan to make more bites or another chocolate treat, store the melted chocolate in an airtight container in the fridge for future use.
Final Freezing
Importance of Allowing Chocolate to Set Properly
Once your bites are fully coated in chocolate, it’s important to let them set properly. This ensures that the chocolate hardens and adheres well to the bites, providing a delightful crunch when you take a bite. Here’s how to go about it:
1. Initial Freeze: Place the baking sheet with the coated bites in the freezer for about 15-20 minutes, or until the chocolate has fully set.
2. Check for Firmness: Once set, the chocolate should feel firm to the touch and should not stick to your fingers.
How to Ensure the Bites Maintain Their Shape During Freezing
To maintain their shape, follow these tips:
– Spacing: Make sure the bites are spaced out on the baking sheet, allowing air to circulate around them as they freeze.
– Storage: Once set, transfer the bites to an airtight container or a freezer-safe bag, layering parchment paper between them to prevent sticking.
Serving Suggestions and Storage
How to Serve Peanut Butter Banana Bliss Bites
These bites are versatile and can be served in various delightful ways:
– Presentation: Arrange the bites on a decorative platter or a tiered serving tray for a visually appealing presentation.
– Pairing: Serve alongside fresh fruit, such as strawberries or apple slices, to complement the sweet, nutty flavor of the bites.
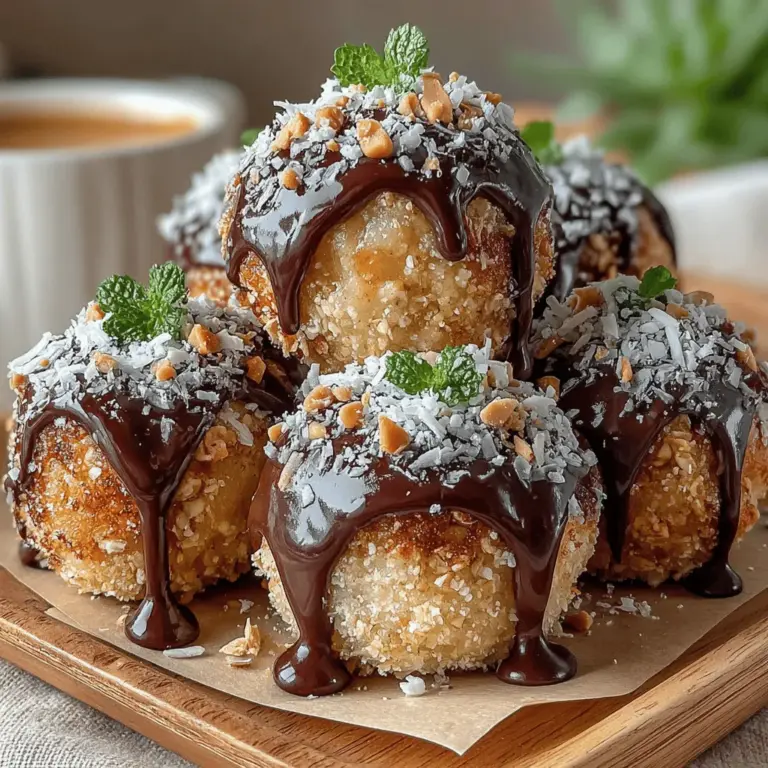
– Enhancing Flavor: Consider adding toppings like crushed nuts, shredded coconut, or a sprinkle of sea salt to enhance the flavor profile and add texture.
Best Storage Practices
To keep your Peanut Butter Banana Bliss Bites fresh:
– Freezing: Store the bites in the freezer for long-term storage. They can last up to three months without losing quality.
– Thawing: When ready to enjoy, remove the desired amount from the freezer and let them sit at room temperature for a few minutes before indulging. This helps to soften the chocolate slightly while keeping the bites cool and refreshing.
Nutritional Information
Breakdown of Key Nutritional Components
Each Peanut Butter Banana Bliss Bite is not only delicious but also packed with energy and essential nutrients. Here’s a typical breakdown per serving (assuming one serving equals one bite):
– Calories: Approximately 100 calories
– Protein: 3 grams
– Fats: 6 grams (primarily from peanut butter)
– Carbohydrates: 10 grams
Health Benefits of the Main Ingredients
– Peanut Butter: A great source of protein and healthy fats, peanut butter is linked to heart health and may help with weight management.
– Bananas: Rich in potassium and fiber, bananas are known to support digestive health and provide quick energy.
– Dark Chocolate: Contains antioxidants and can improve heart health while satisfying sweet cravings.
Creative Variations and Substitutions
Flavor Variations
Experimenting with different flavors can elevate your Peanut Butter Banana Bliss Bites:
– Spices: Add a pinch of cinnamon or nutmeg to the peanut butter mixture for an aromatic twist.
– Flavor Extracts: A few drops of almond extract or vanilla can enhance the overall flavor profile.
– Mix-Ins: Consider incorporating chopped nuts, dried fruit, or mini chocolate chips into the peanut butter mixture for added texture and flavor.
Dietary Modifications
If you want to adapt the recipe for specific dietary needs, here are some suggestions:
– Gluten-Free: Ensure that any chocolate or additional ingredients you use are certified gluten-free.
– Nut-Free: Substitute peanut butter with sunbutter or soy nut butter for a nut-free alternative.
– Vegan Options: Use dairy-free chocolate and maple syrup instead of honey to keep the recipe vegan-friendly.
Conclusion: Enjoying Your Peanut Butter Banana Bliss Bites
Peanut Butter Banana Bliss Bites are not just a tasty snack; they are a wholesome treat that can be enjoyed by everyone. With simple ingredients and easy preparation, these bites provide a quick energy boost while satisfying your sweet cravings. Whether you indulge in them straight from the freezer or share them with friends and family, you can feel good about nourishing your body with every bite. Embrace the joy of making these blissful treats and experiment with different variations to make them your own. Enjoy the delightful blend of flavors and textures, and let each bite bring a smile to your face!
