Homemade crispy garlic breadsticks are a delightful addition to any meal, offering a perfect blend of flavor and texture that can elevate even the simplest of dishes. Whether enjoyed as an appetizer, side dish, or snack, these breadsticks are versatile and beloved by many for their satisfying crunch and rich flavor profile. Infused with the aromatic essence of garlic, buttery goodness, and a medley of herbs, they are sure to please any palate. The best part? They pair seamlessly with a variety of meals, from hearty pasta dishes and savory soups to fresh salads and grilled entrees, enhancing the overall dining experience.
Understanding the Appeal of Garlic Breadsticks
Garlic breadsticks are not just a culinary delight; they also carry cultural significance across various cuisines. In Italian cuisine, for example, the use of breadsticks, or “grissini,” dates back centuries, often served as an appetizer or a companion to antipasto platters. Their crisp texture and savory flavors make them a staple in many households and restaurants alike. Similarly, in American cuisine, garlic breadsticks have become a popular accompaniment to pasta, with many restaurants offering them as a complimentary side to enhance the meal.
The allure of garlic and herbs in cooking is undeniable. Garlic, known for its robust flavor and many health benefits, has been a revered ingredient throughout history. Combined with fragrant herbs, it transforms simple bread into a gourmet experience. Creating homemade breadsticks allows you to connect with this rich culinary tradition while also bringing the joy of baking into your own kitchen. The satisfaction of pulling fresh, golden breadsticks from the oven, their surface glistening with melted butter and flecked with herbs, is a moment of pure bliss—one that brings families together around the dinner table.
Ingredients Breakdown
To create the perfect crispy garlic breadsticks, it’s essential to understand the role of each ingredient in the recipe. Here’s a closer look at what you’ll need:
– All-Purpose Flour: This is the foundation of your dough, providing the necessary structure. It gives the breadsticks their chewy texture while allowing for a light and airy crumb.
– Active Dry Yeast: This ingredient is critical for leavening the dough, helping it rise and develop a light, fluffy texture. The yeast ferments the sugars present in the dough, producing carbon dioxide, which creates air pockets.
– Warm Water and Sugar: The combination of warm water and sugar activates the yeast, ensuring that it can effectively rise. The warmth helps to wake the yeast, while the sugar serves as food, enhancing the fermentation process.
– Olive Oil: Adding richness and moisture to the dough, olive oil also contributes to the overall flavor. It helps create a tender breadstick that has a delightful crust when baked.
– Unsalted Butter: This ingredient serves a dual purpose. It provides flavor and aids in achieving a crispy finish on the breadsticks. Brushing melted butter on top before baking enhances the golden color and adds a luscious richness.
– Garlic and Italian Herbs: These are the stars of the show. Fresh minced garlic imparts a fragrant, savory flavor, while a blend of Italian herbs—such as oregano, basil, and thyme—adds depth and complexity to each bite.
– Parmesan Cheese: Sprinkling grated Parmesan cheese on top of the breadsticks adds a savory, cheesy finish that complements the garlic and herbs beautifully.
– Fresh Parsley: A sprinkle of freshly chopped parsley not only adds a pop of color but also a hint of freshness that rounds out the flavors.
Step-by-Step Instructions for Perfect Garlic Breadsticks
Creating crispy garlic breadsticks at home is a rewarding experience that begins with careful preparation. Follow these detailed steps to ensure your breadsticks turn out perfectly every time.
Activating the Yeast
The first step in making your garlic breadsticks is to activate the yeast. This process is crucial for ensuring that your dough rises properly. Begin by measuring out warm water, ideally between 100°F to 110°F (38°C to 43°C). Too hot, and you risk killing the yeast; too cold, and the yeast won’t activate effectively. Add a teaspoon of sugar to the warm water, then sprinkle the active dry yeast on top. Allow the mixture to sit for about 5 to 10 minutes until it becomes frothy and bubbly. This indicates that the yeast is alive and ready to work its magic in your dough.
Making the Dough
Once your yeast is activated, it’s time to mix the dough. In a large mixing bowl, combine the all-purpose flour and a pinch of salt. Make a well in the center and pour in the yeast mixture along with the olive oil. Using a wooden spoon or your hands, mix the ingredients together until they begin to form a cohesive dough. The goal here is to achieve a smooth, elastic consistency. If the dough feels too sticky, you can gradually add more flour, one tablespoon at a time, until it reaches the desired texture.
Kneading
Kneading the dough is a vital step that develops gluten, which gives the breadsticks their chewy texture. Turn the dough out onto a lightly floured surface and begin kneading by pushing the dough away from you with the heel of your hand, then folding it back over itself. Rotate the dough a quarter turn and repeat the process. Knead for about 8 to 10 minutes until the dough is smooth and elastic. It should spring back when poked gently with a finger. Proper kneading is essential for achieving the perfect texture, so don’t rush this important step.
With these initial preparations complete, you’ll be well on your way to creating delicious and crispy garlic breadsticks that will impress family and friends alike. Stay tuned for the next part of the recipe, where we’ll continue with shaping, baking, and enjoying these irresistible treats.
{{image_2}}
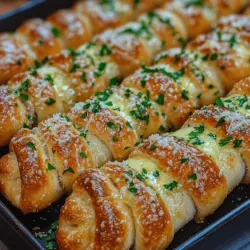
Garlic breadsticks are a delightful addition to any meal, offering a warm, comforting experience that perfectly complements a variety of dishes. In this section, we will cover the essential steps for perfecting your crispy garlic breadsticks, including tips for shaping, baking, and serving. By the end, you’ll be ready to impress your family and friends with your culinary skills.
First Rise: Creating the Ideal Environment for Dough to Rise
The first rise is crucial for developing the flavor and texture of your garlic breadsticks. To create an ideal environment for your dough to rise, follow these steps:
1. Warm Space: Yeast thrives in warm conditions. Find a warm, draft-free area in your kitchen to let the dough rise. A common technique is to preheat your oven to the lowest setting for a few minutes, then turn it off and place the dough inside, covered with a damp cloth.
2. Dough Preparation: After mixing your ingredients, knead the dough until it is smooth and elastic. This typically takes about 5-7 minutes. The dough should slightly spring back when poked.
3. Covering: Place the kneaded dough in a large bowl, lightly greased with olive oil. Cover it with plastic wrap or a damp kitchen towel to retain moisture. Allow it to rise for about 1 to 1.5 hours, or until it has doubled in size.
Preparing the Garlic Mixture: Balancing Flavors and Avoiding Burnt Garlic
The garlic mixture is what elevates your breadsticks from simple to sensational. Here’s how to prepare it effectively:
1. Choosing the Garlic: Fresh garlic is essential for the best flavor. Use a garlic press or finely mince the garlic cloves to ensure even distribution throughout the mixture.
2. Balancing Flavors: Combine the minced garlic with softened butter and a pinch of salt, and consider adding herbs such as parsley or basil for an extra layer of flavor. Mix thoroughly.
3. Cooking the Garlic: To avoid the bitterness that can occur with burnt garlic, consider sautéing it briefly in a pan over low heat until fragrant, but not browned. This will enhance the flavor without compromising the taste.
Shaping the Breadsticks: Techniques for Twisting and Arranging
Shaping your breadsticks correctly is vital for an appealing presentation and uniform baking. Here’s how to do it:
1. Dividing the Dough: Once your dough has risen, punch it down to release excess air. Divide it into equal pieces, typically 10-12 for standard breadsticks.
2. Rolling and Twisting: Roll each piece into a long, thin rope about ¼ inch thick. For a twisted effect, hold the ends of the rope and twist it gently a few times before placing it on a baking sheet.
3. Arranging: Place the shaped breadsticks on a parchment-lined baking sheet, ensuring there is enough space between each stick to allow for rising and baking.
Second Rise: The Significance of Allowing the Dough to Rise Again
The second rise is essential for achieving light and airy breadsticks. Here’s why it matters:
1. Texture Development: During this rise, the dough continues to expand, creating air pockets that contribute to a fluffy texture. Aim for a rise of about 30 minutes after shaping.
2. Covering: Again, cover the dough with a clean kitchen towel to keep it from drying out.
3. Final Check: Before baking, the dough should feel slightly puffy to the touch, indicating that it is ready for the oven.
Baking: Perfect Oven Settings and Timing for Optimal Crispness
Baking your garlic breadsticks correctly will ensure they turn out perfectly crispy. Follow these guidelines:
1. Preheat the Oven: Set your oven to 400°F (200°C) and allow it to preheat fully. A hot oven ensures a crisp exterior while keeping the inside soft.
2. Baking Time: Bake your breadsticks for about 12-15 minutes or until they are golden brown. Keep a close eye on them, as ovens can vary.
3. Cooling: Once baked, remove the breadsticks from the oven and let them cool for a few minutes on a wire rack to maintain their crispiness.
Garnishing and Serving: Enhancing Presentation and Flavor with Butter and Parsley
Presentation is key when serving garlic breadsticks. Here’s how to elevate your dish:
1. Butter Application: Brush the warm breadsticks with the prepared garlic butter mixture immediately after removing them from the oven. This allows the buttery flavor to soak in and enhances the aroma.
2. Garnishing: Finely chop fresh parsley and sprinkle it over the breadsticks for a pop of color and additional flavor.
3. Serving Options: Serve your garlic breadsticks warm with a side of marinara sauce, olive oil and balsamic vinegar for dipping, or alongside your favorite cheese spreads.
Common Mistakes to Avoid
Making garlic breadsticks can be simple, but there are common pitfalls to watch out for:
Yeast Not Activating Properly: Signs to Look For
If your dough does not rise, it may be due to inactive yeast. To ensure your yeast is active, check for foaming or bubbling when mixed with warm water and sugar. If there’s no reaction, it’s best to start over with fresh yeast.
Over-Kneading or Under-Kneading the Dough: How to Tell
Proper kneading develops gluten, giving the dough structure. If over-kneaded, the dough can become tough. If under-kneaded, it may lack elasticity. The dough should be smooth and slightly tacky, and it should spring back when poked.
Incorrect Baking Time or Temperature: Ensuring the Right Texture
Baking at too low of a temperature results in soggy breadsticks, while too high can burn the edges. Always preheat your oven and monitor the breadsticks closely during baking to achieve a perfect golden-brown color.
Serving Suggestions and Pairings
Garlic breadsticks are incredibly versatile and pair well with various accompaniments:
Marinara Sauce: The Classic Pairing for Dipping
Nothing beats the classic pairing of garlic breadsticks with marinara sauce. The tangy sauce complements the rich garlic flavor perfectly, making it a popular choice for dipping.
Olive Oil and Balsamic Vinegar: A Sophisticated Alternative
For a more refined option, serve your breadsticks with a small dish of high-quality olive oil and balsamic vinegar. This combination allows for a delightful dipping experience that enhances the breadsticks’ flavor profile.
Cheese Dips or Spreads: Elevating the Flavor Experience
Consider offering cheese dips, such as a warm cheese fondue or creamy feta spread, for a rich and indulgent flavor boost. These additions transform your garlic breadsticks into a gourmet appetizer.
Nutritional Analysis
When comparing homemade garlic breadsticks to store-bought options, there are notable differences in nutritional content:
Healthier Ingredients and Customization Options
Homemade garlic breadsticks allow you to control the ingredients, using whole wheat flour or organic products to enhance their nutritional value. You can also adjust the amount of butter and garlic to suit your dietary preferences.
Dietary Modifications
For those with dietary restrictions, consider using gluten-free flour blends to create a gluten-free version of garlic breadsticks. This modification allows everyone to enjoy this delicious treat without compromising their dietary needs.
Conclusion
Making crispy garlic breadsticks at home brings joy and satisfaction that store-bought versions simply cannot replicate. Their versatility as a side dish or snack makes them a wonderful addition to any meal, perfect for gatherings, casual dinners, or simply enjoying as a comforting treat.
As you embark on this culinary adventure, remember that the key to success lies in the details—from creating the perfect dough to baking it to a delightful crispness. Encourage your friends and family to join you in making this recipe, and watch as everyone gathers around to enjoy the delicious results. Your homemade garlic breadsticks will surely become a favorite, bringing warmth and togetherness to your table. Enjoy the process, and savor every bite!